
If you own a Windows tablet or working on a PC with primary storage device as an SSD where the Windows is installed then your PC might run out of space soon. Now you need is to get a bigger section of your hard drive for your main Windows installation. This solution is a bit impossible to do because you have lots of important data which could get lost in the process. The best solution for this issue is that you can change the default installation folder for the Windows Store apps.
This way, all the games, and apps which you will install from the store will go straight to other drive and you don’t have to worry about running out of space anymore. Just follow the simple steps and it will be done in no time. You don’t need to play with the registry or anything else to do that. There is just a simple setting which you have to change. Here are the steps to change the destination folder for Store apps installation.
- Open Start menu and launch Settings app.
- Inside the search bar on the top, type Storage.
- Select the first option you see in the search.
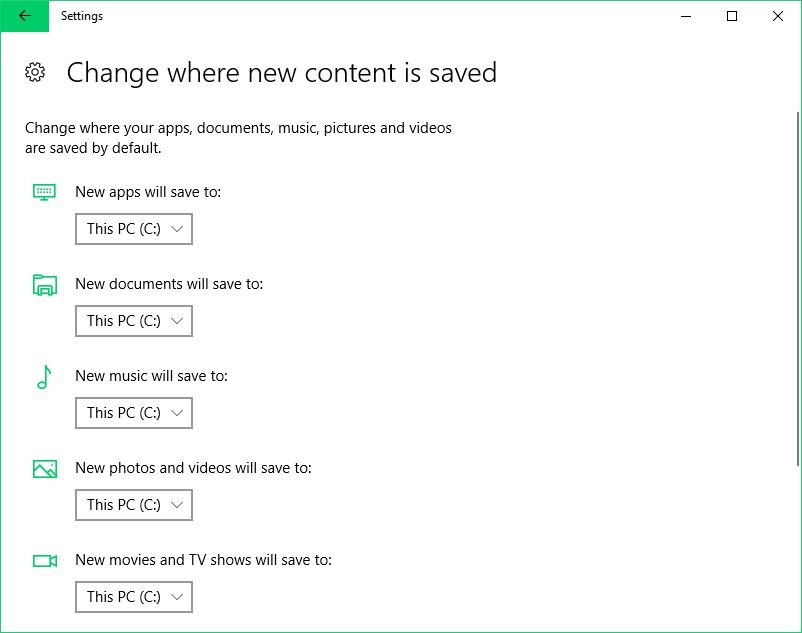
- You will see a screen just like in the screenshot below.

- Change the “New apps will save to” option to the desired drive.
- Once the drive is changed, restart the computer to take effect and everything you will install on your PC, later on, will go directly to the selected drive.
This is the easiest way to change the default directory for Store apps installation. There is another way which let you create more space on the main drive on which the Windows is installed. You can move the selected apps to different drive and it will make some more free space on the main drive. Just follow the steps from below to move the Windows apps to the different location.
- Open Start menu and launch Setting app.
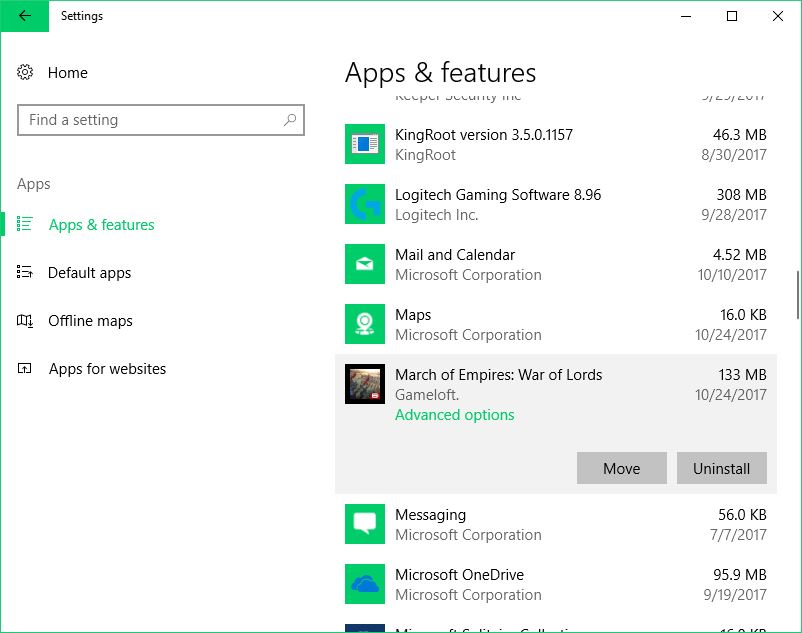
- Go to Apps section and you will see a list of all the apps installed on your PC.
- Now click on the app you want to move and you will see a Move button with Uninstall button.
- Click the Move button and you will see the list of drives attached to PC.
- Just select the drive and wait some time till the app moves to the other drive.
Conclusion
These were the best and the easiest way to change the default installation folder for Store apps in Windows 10. If you know more tricks to do the same thing then make sure to share it with us in the comment section. Or if you have any queries then share them with us using the comment section below.