

From the Windows 8 onward, Microsoft has enabled non-touch devices running the Windows OS, like desktop PC systems to install and run the applications from the Windows Store. The main advantage of installing and using applications from the Windows Store is that the applications will be safe from any malware and will be light-weight thus consuming less hard drive space of your Windows PC. However, you will not be able to normally find the installation files of the Windows Apps installed from the Windows Store. This is because they are hidden within your Windows 10 system. If you are searching on how to access WindowsApps folder in Windows 10 powered desktops, then today we bring you a guide on the same.
How to Access Windows Apps Folder in Windows 10?
Similar to the files of any other applications installed on your Windows 10 system, files of applications that are installed from the Windows Store onto your Windows 10 PC are also stored on your PC itself.
Below is how you can access the Windows Apps folder in Windows 10 easily.
- Launch the My Computer (also known as “This PC”) app on your desktop.
- From the window that appears, click on the “Local Disk (C:)” option.
- From the list that appears, double-click on “Program Files”.
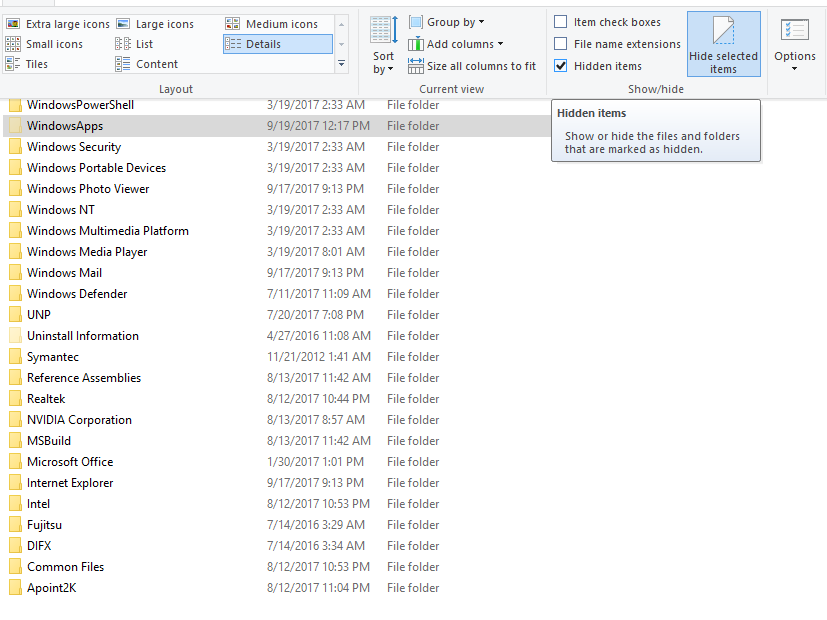
- When the Program Files window opens, click on the “View” tab and enable the “Hidden Items” option to display the hidden files and folders on your Windows 10 system.
- Now, search for the “WindowsApps” folder.
- This is where all the installation files of applications downloaded from the Windows Store are stored.
After finding the WindowsApps folder, if you try opening the folder, you will get a dialog box that says “You have been denied permission to access this folder”. This error repeats even if you try opening the folder as the System Administrator.
How to open Windows Apps folder in Windows 10
- Using your mouse, right-click on the “WindowsApps” folder.
- From the drop-down menu that appears, click on the option that says “Properties”.
- When the new Properties window shows up, switch to the “Security” tab and within the Security section, click on the button that says “Advanced”.
- From the window that appears, click on the “Change” button available next to the “Owner:” field.
- Now from the new window that appears, again click on the “Change” button next to the “TrustedInstaller” field.
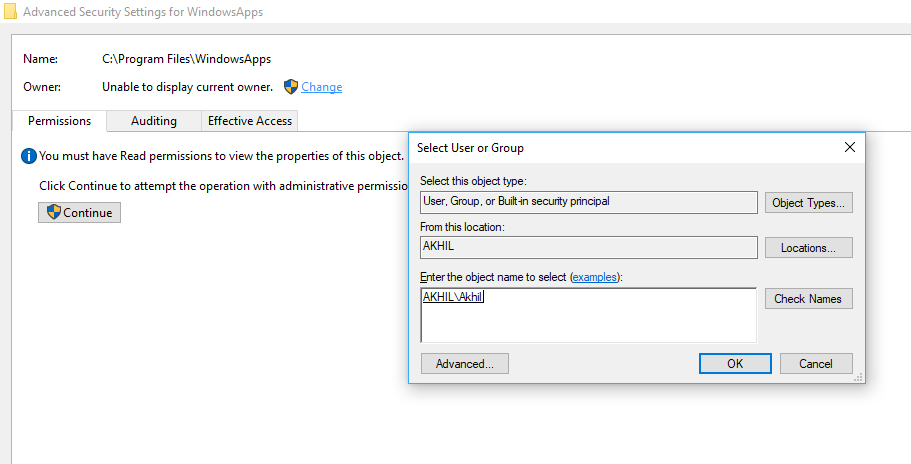
- A new window called “Select User or Group” will now open.
- From this window, in the text area provided under the “Enter the object name to select” title, enter the username with Administrator powers in your Windows 10 system.
- Click on the “OK” button.
- In the window that you saw in Step 5, make sure a new field that says “Replace Owner on Subcontainers and Objects” now appears and the checkbox next to this field is ticked.
- Click on the “Apply” and “OK” button to save the changes.
- You will now be prompted about the change of ownership, wait until this process completes.
- Now you can open the WindowsApp folder like any other folder on your Windows 10 system.
Final Words
This is how you can access the WindowsApps folder on your Windows 10 device. If you have any queries or want to suggest something for our blog or this article then feel free to use the comment section. If you found this article helpful, do share this article and subscribe to us for more useful guides on Windows 10.
Thank you. I am now able to take control of my apps.