

When you install Windows 10 on your PC, the first account you create will always be the administrator account. It enables you to access and manage every aspect of your computer.
However, when you share your PC with other PCs, the account created becomes the Standard User Account by default. These accounts are more restricted and the user may not get access to everything.
Thus, in Windows 10, users can see two types of accounts:
- Administrator account: It offers complete control over the computer. The users of this account can change the settings of their PC globally, they can install programs, and they can even get through the User Account Control (UAC) if required.
- Standard User account: It offers limited control over the computer. Standard account user can just run the applications, but cannot install new ones. The user can modify the setting of his account only. And if this modification is impacting other accounts, the access will be denied. If any task requires elevations, then the user will be asked to provide the username and password for an administrator to pass through the UAC prompt. Such types of account are a better option for a child’s account or who wants to use it for minimum purpose or for a guest (as Windows 10 has omitted guest user default account).
Many times more than one administrator accounts are required on your Windows 10 PC. Maybe when you forgot the password or your current administrative account is corrupt or when you wish to share your PC with someone and allow them to have full control over the PC by creating one more administrator account for them.
There are different ways through which you can create an administrator account. Whenever you create a new account in Windows 10, by default that is a standard user account. Listed below are methods to create an administrator account in Windows 10:
Using Command Prompt
In order to get this option, press the Window key + X to open the Quick access menu and then click on the Command Prompt (Admin). Then to create a new local account, type commands:
Net user (name of local admin account) /add
Net local group Administrators (name of local admin account) /add
A new local administrator account will be successfully added to the Windows 10.
Using PC Settings
The beauty of Windows is that you can do the same task in many different ways.
In order to open the Settings, press the Windows button. Start menu will be displayed. Select Settings.

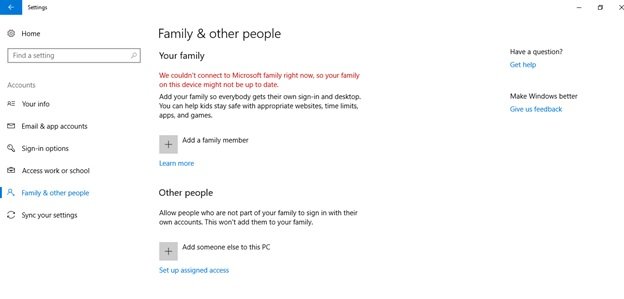
Settings of the PC will be opened. Click on Accounts. On the left side, “Family & other users” will be displayed. Click on it. Next click on “Add someone else to this PC”.
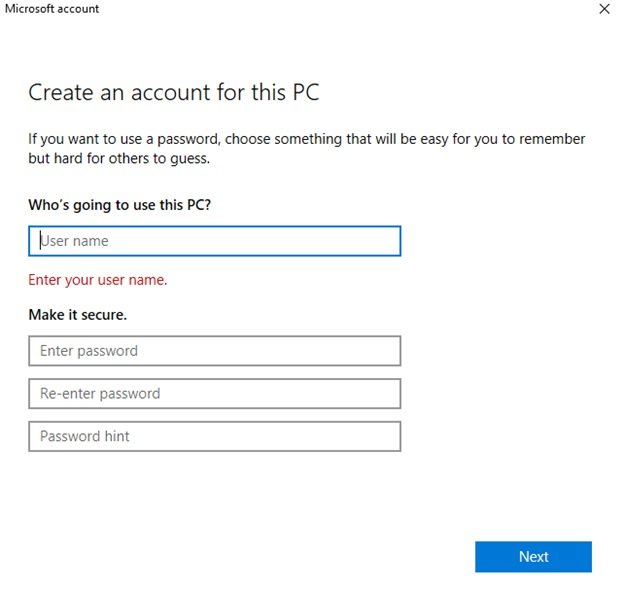
A new page asking for the name of your new local account, password and password hint will be displayed. Fill the blanks and click on “Next” tab.
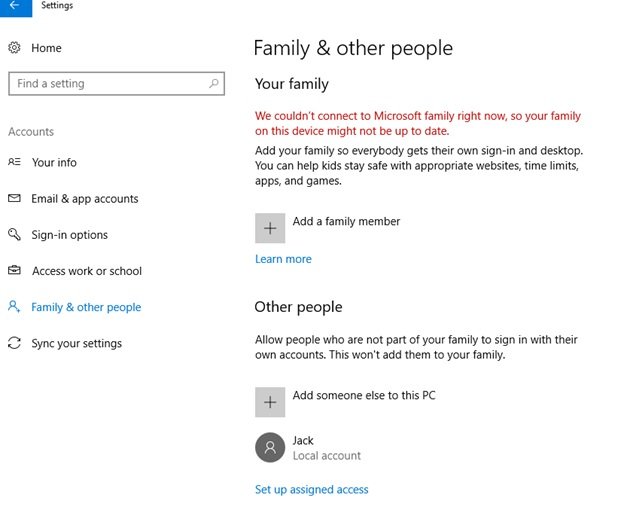
Now, you would be navigated to the new account’s screen. As discussed above, this new account is a Standard account /limited account. Click on the new account type just created. Click on the tab “Change account type”.
A window will be displayed asking for account type to be selected. Select Administrator account and click on the OK tab.
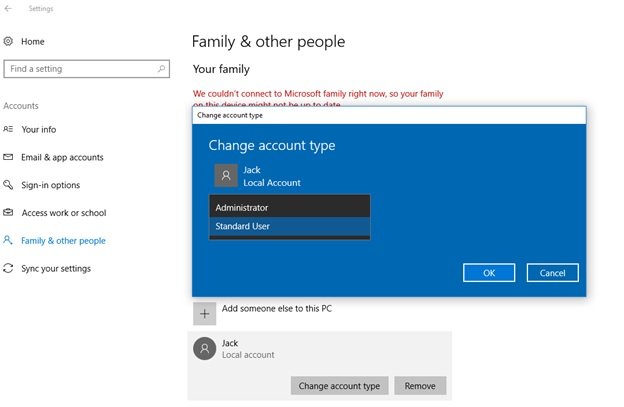
A new Administrator account is created by creating a standard user account and then changing it to the Administrator account.
Local Users and Group Console
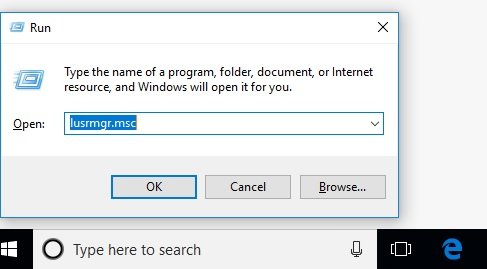
Open the run box by pressing Windows key + R. A box asking you to type the name of a folder or internet resource or document and windows will open it for you will be displayed. Type lusrmgr.msc and press Enter.
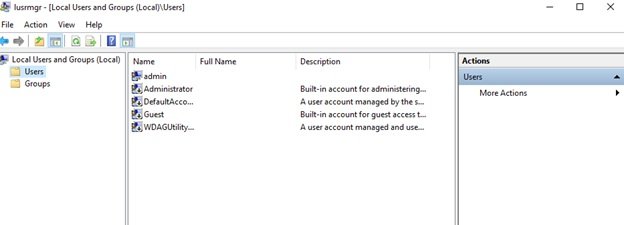
A new page Local Users and Group Console will be displayed on your Windows 10. On the left pane, right-click on Users. A drop-down menu will be displayed. Click on “New User…”
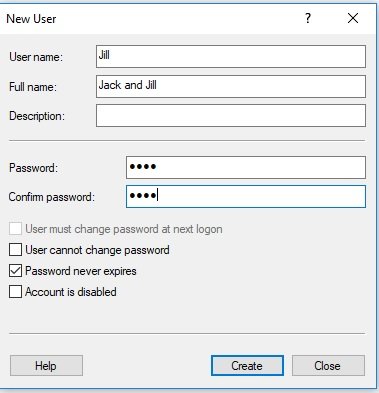
Another page will be displayed asking you to fill new account details like name and password. Fill the details and uncheck the “User must change password at next logon” option and check “Password never expires option”. Click and create and then close.
A new page will be opened displaying all name of your newly opened account in the right pane. As stated earlier by default this new account will be a standard or limited account. In order to change it to the administrator account, double-click on the new account.
A new Window of Properties will be opened. Click on the add tab. A Select group page will be displayed.
In the box of Enter the object name to select type Administrators and click on OK.
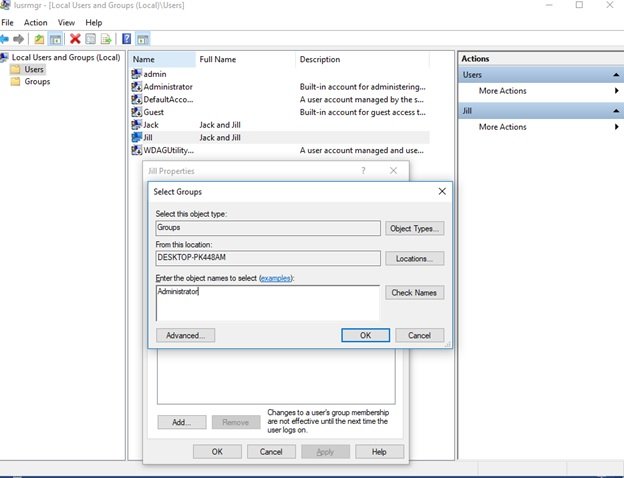
The new account will get added up to the Administrators group. Click on Apply to complete the changes.
Now, reboot your PC or logoff to sign in your new account and perform admin tasks.
Change the standard user account type
Windows 10 facilitates one more way to form a new account type. Simply convert the standard user account into an administrator account. Again it can be done in various ways. Thanks to Windows!!
In the above-mentioned PC settings method, click on Family & other people and select the account you wish to change. Click on “Change account type” tab. Select Administrator type and click on OK. The account will be transformed into the Administrator account. Reboot to log in and check it.

Another method is to change through Control Panel. Press Windows + X key and click on Control Panel. Select change account type and click the standard account you wish to change. Select administrator account and again click on change account type. Your standard account has transformed into an administrator account. Reboot your PC or logoff. Now, login to your new account and check if you are able to make all the changes and have access to settings modifications as an administrator.
In Windows 10, there are various ways to form a new administrator account or simply convert existing standard user account into an administrator account. You can try any one of them!