
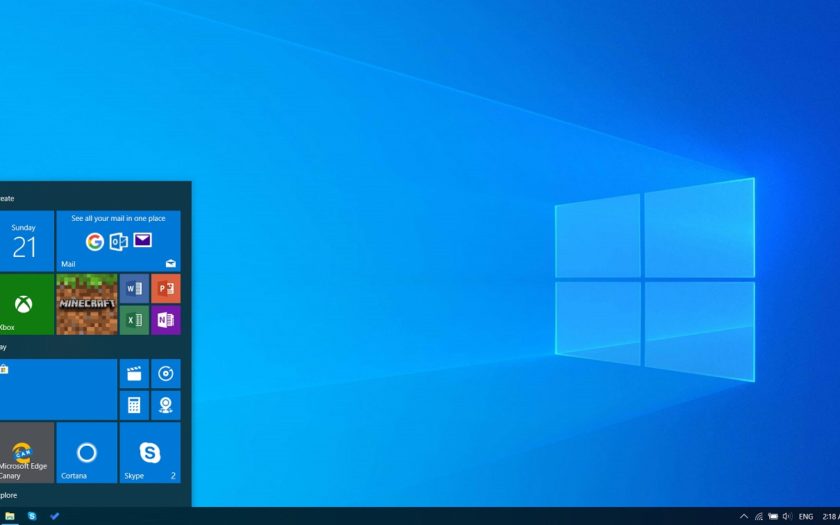
The basic concept behind the Windows 10 start menu is quite similar to the previous OS versions. Also, it is still the place where most of the users go to shut down their PCs or access programs and system utilities. So, what’s new in the Windows 10 start menu? Well, Microsoft added a new dimension to it by adding Windows Store apps and live tiles on the right side, this is exactly what’s making it different from the previous versions and impressing most of the users.

For those who haven’t embraced its colorful tiles and menus, you are surely missing out a great experience, especially those users who have touchscreen laptops or Windows Tablet. With a bit of customization, users can alter the Start menu into something advantageous.
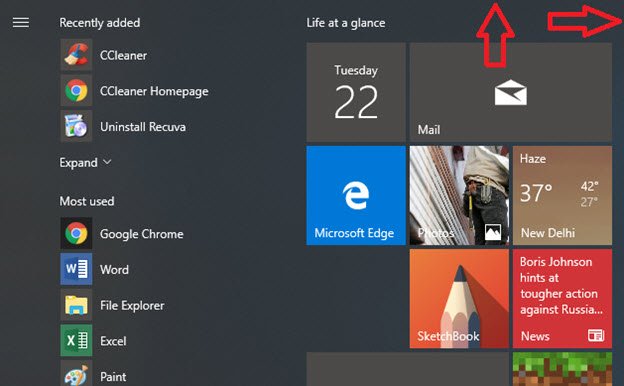
Windows 10 Start Menu Layout
Let’s break down how the Start menu in Windows 10 is organized. It’s alienated into three sections.
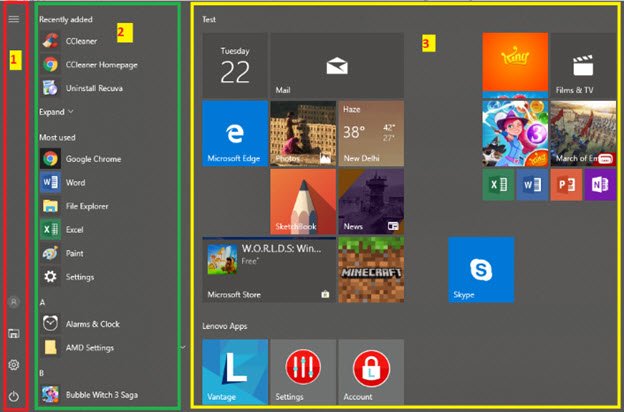
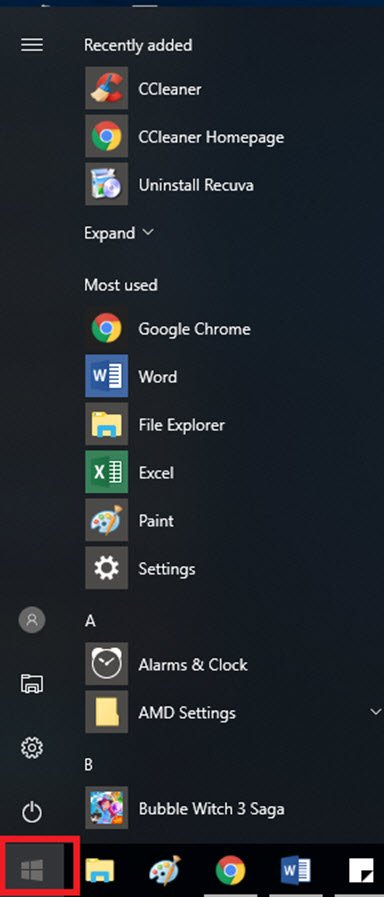
- Narrow panel on the left
This panel features icons for important menu items which differ depending on your settings, it includes users account, settings, and power options. By default, these icons are unlabelled, to figure out which icon it is, users can tap or click the menu button at the top of this section to divulge labels for each icon.
- The Center Panel
This panel houses a list of all the user’s applications, starting with those you recently added at the top, then the most user’s ones and then in alphabetical order.
- The Large Panel
This panel displays on the right side, this panel contains colorful tiles labeled as Life at a Glance, Create, Play, Explore and so on.
Steps to arrange your Windows 10 Start Menu
Now since you know the layout of the Start Menu, let’s get to know the ways in which you can tailor it.
- Customize The Far-Left Panel
The left panel on the Start Menu can have a minimum of 2 and a maximum of 12 icons. To customize:
- Click on the “Start Menu”
- Go To “Settings” menu
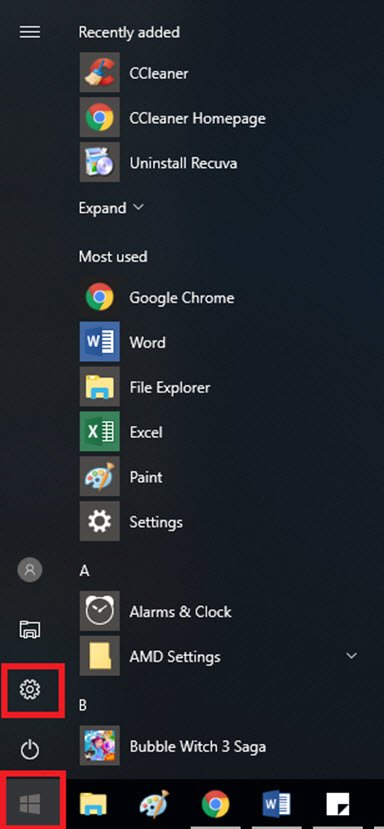
- Click On “Personalization”
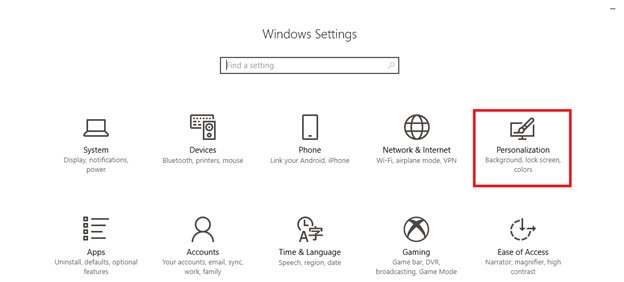
- Click On “Start”

- Click On “Choose which folders appear on Start”
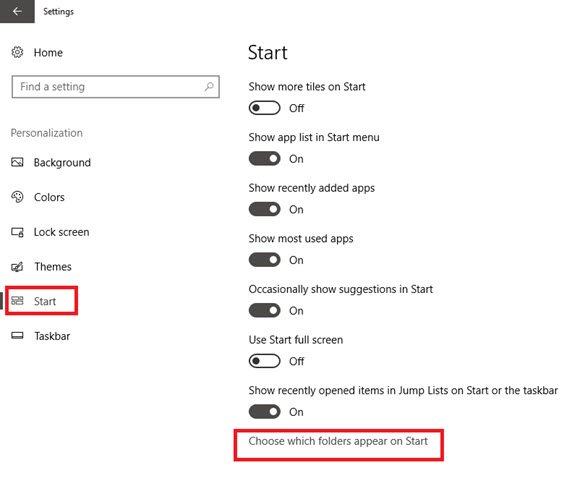
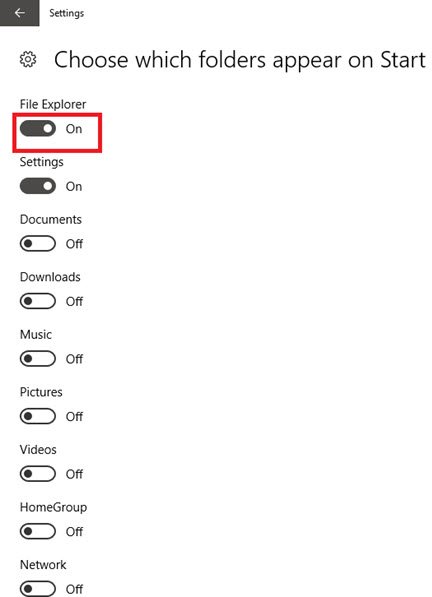
- Toggle on/off the icons
- Full-Screen Start Menu
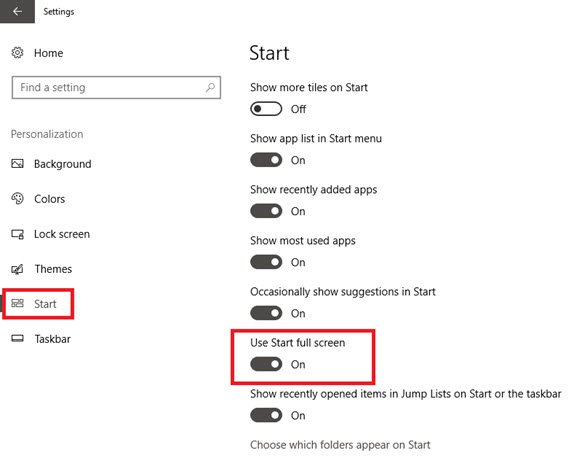
If you are using a tablet, by default the start menu is full-screen, but for PCs or Laptops, there is a partial-screen Start menu. To activate full-screen experience on a PC or laptop:
- Click on the “Start Menu”
- Go to “Settings”
- Click On “Personalization”
- Go to “Start”
- Toggle on “Use Start full screen”
- Resize Start Menu
The Start Menu can be quickly resized by simply dragging the top or right edge of the menu with the help of your mouse.
- Change The Color Of Your Start Menu
You can make your start menu even more interesting by changing the colors.
- Click on the “Start Menu”
- Go to “Settings”
- Click on “Personalization”

- Hit on “Colors”
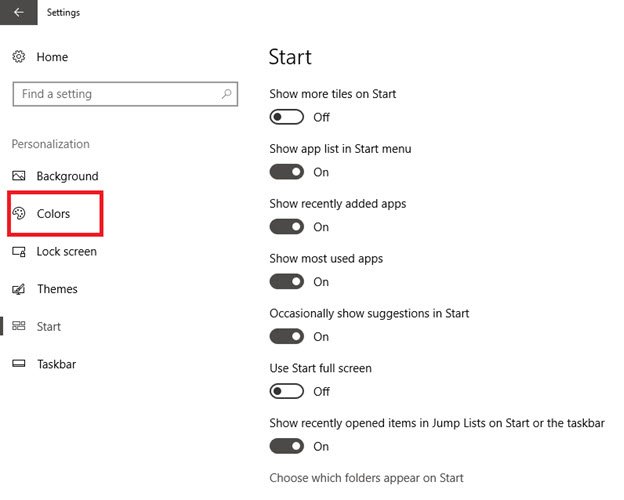
- Pick color
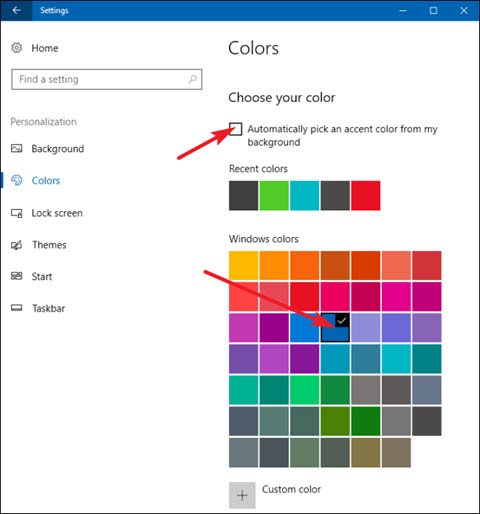
- Tick “Show color on Start, taskbar, and action center”.
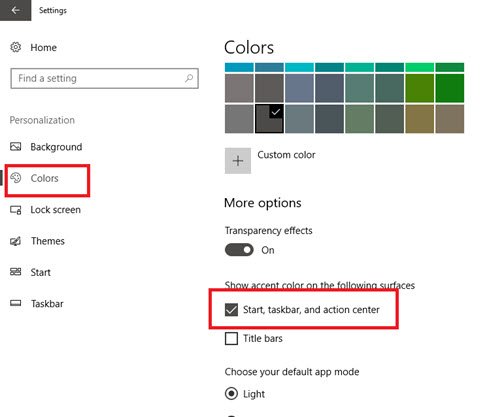
Note: If you want your Start menu to be transparent, turn on the “Transparency Effects” toggle under more options.
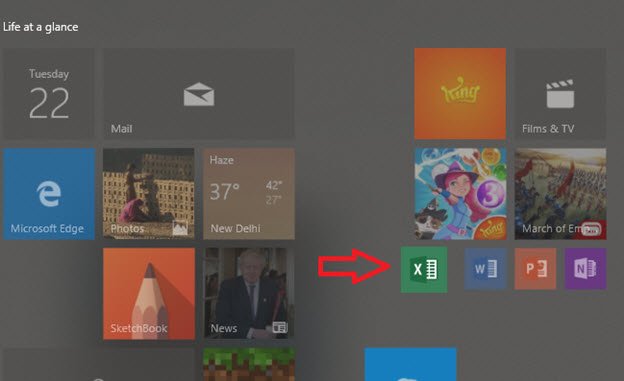
- Pin And Unpin Apps
To pin an application to the right panel of the Start menu as a tile:
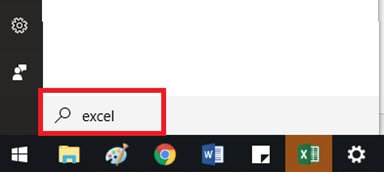
- Click on the “Start Menu”
- Search for the app in the center-left panel of the Start menu
- Right-click on the app
- Click “Pin to Start” or simply drag and drop it into the tile section of the Start menu.
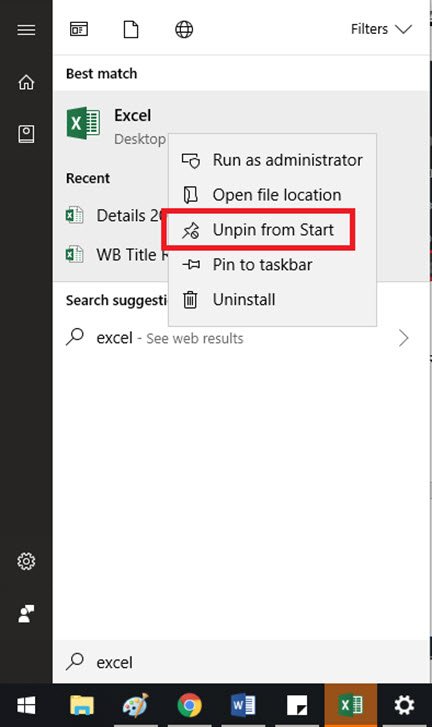
To unpin an application:
- Click on the “Start menu”
- Search for the app in the center-left panel of the Start menu
- Right-click the app tile
- Hit on click “Unpin from Start”.
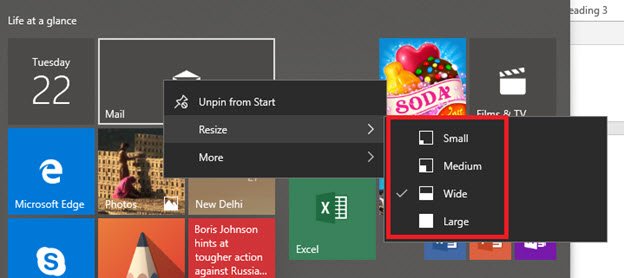
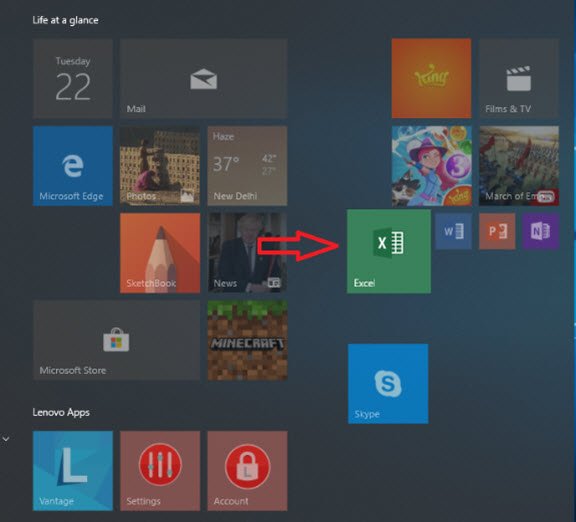
- Resize Tiles
- Click on the “Start Menu”
- Right click on the app you want to resize.
- Click on “Resize”.
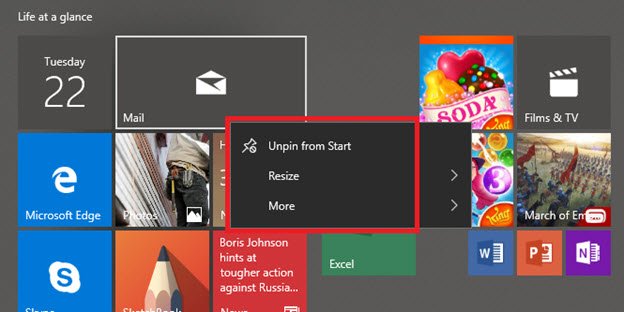
- Select the option you want (Small, Medium, Wide or Large)
- Move Tiles
- Click on the “Start menu”
- Click and hold on the tile you wish to move
- Drag the tile to your desired position
- Let It Go.
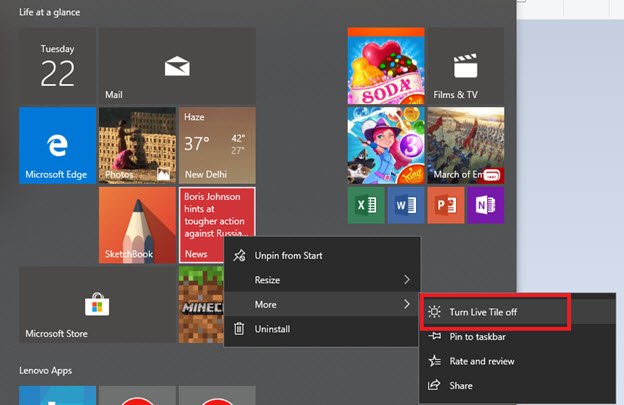
- Turn Off Live Updates
Live tiles are an interesting feature on the Start Menu as they display live information on them. Basically, they look like a slideshow, but if you don’t like this feature, you can turn it off.
- Click on the “Start Menu”
- Right click on the live tile you wish to turn off
- Hit on “More”.
- Click on “Turn live tile off”
- Group Tiles Into Folders
Even that extra-wide space on the Start menu might start looking cluttered when you add too many tiles. Users can organize the Start Menu tiles into folders, it is basically grouping like-minded tiles together in one place. To create a new folder, you need to drag any tile and drop it onto another tile. Those 2 tiles will now be grouped into a folder. This function is similar to creating folders on smartphones. Once you have tiles in a folder, you will need to simply click on the folder to expand it.
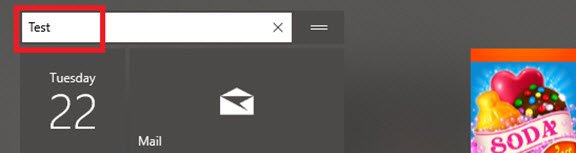
- Rename Group Tiles In Start Menu
The default titles on the start menu (like “Life at a glance” and “Play and explore.”) can be altered in to time.
- Click on the “Start Menu”
- Click on the title you want to change
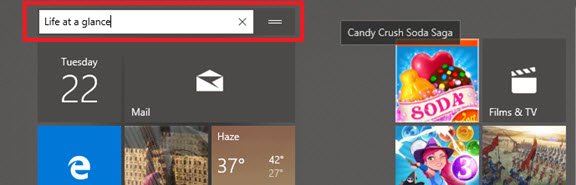
- Delete the text appearing in the type field
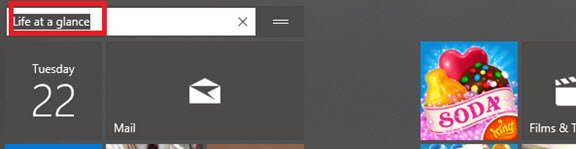
- Type the new title
Final Thoughts
These tips and tricks will surely help you transform your Windows 10 Start Menu to something very useful. Got any other customization tips? Share with us!