
Microsoft Windows comes with most of the needed utilities preinstalled and you might not be aware of all of them. One of the most useful ones which we are going to talk about is the Disk Managment, this is a powerful tool which let you do a lot of stuff related to hard drives like creating and deleting partitions. Here you are going to know about each and every functionality of the Disk Management including the most important one; create a partition in USB drive.
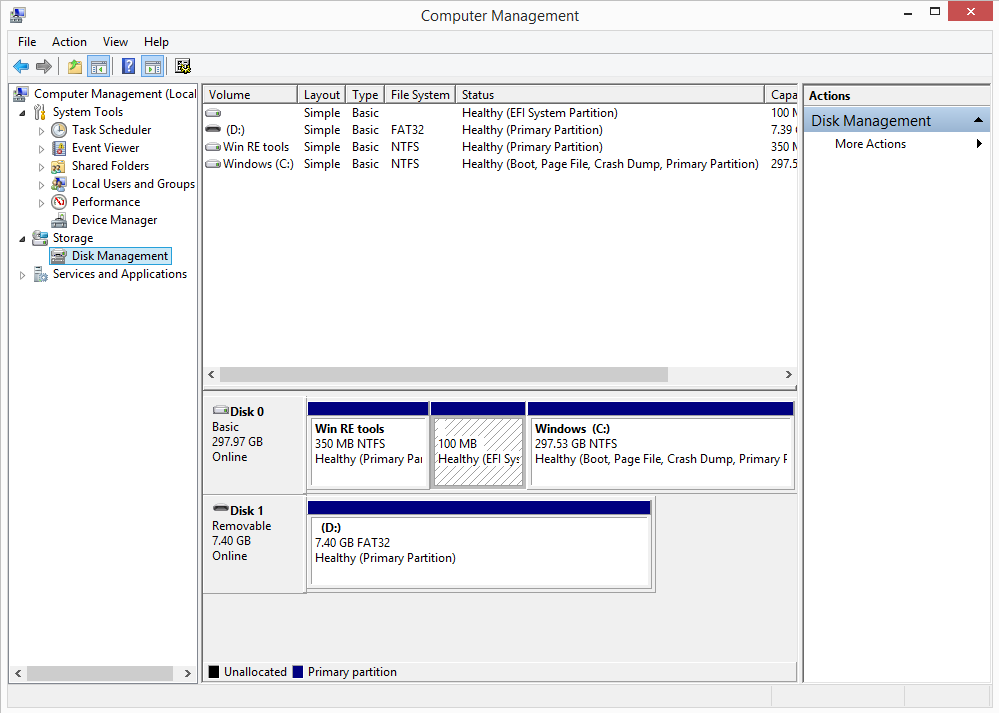
To launch the Disk Management utility, all you have to do is right-click on the Start button and select Disk Management. If you are on Windows 7 then open start menu then right click on Computer and select Manage. Computer Management window will open, just select the Disk Management from the left pane and you will see all the Disk Management option in the main window.
Format RAW hard drive
If you are going to upgrade your PC with a new hard drive then you have to use Disk Management utility to format that drive and start working on that drive. Follow the following steps in steps to format a raw a hard drive to use it on your PC.
- Launch the Disk Management utility.
- The newly inserted drive will show as “Unallocated”.
- Right-click the drive and select “New Simple Volume”.
- A wizard will open, just click Next on all the pages and finally Finish.
- Your Drive will be ready for use.
This trick will also help you if your drive starts to malfunction or got a bad sector. Simple delete the volume and repeat the steps from the above guide to make it start working again. P.S. make sure to backup your data first before deleting the volume because it will delete the data.
Create Partition
Now, what if you want to partition your flash drive, why you ask? So you can lock the partition with the important files and others can still use the other partition as usual. Follow the steps to partition USB drives. Backup all your data before creating a partition or it will destroy all the data inside the drive.
- Connect your flash drive to your PC and launch Disk Management utility.
- Right-click the USB drive and select “Shrink volume”.
- Select the size you want to give to that partition and give it a name (default is the whole free space).
- Click Next and then Finish.
Now your USB drive has two partitions, you can now lock one of them and leave the other one unlocked so others can still use that space. You can delete that partition using the “Extend Volume” option and all the process is similar to the one written above.
Conclusion
Disk Management is a powerful utility and you should not use any of the functions for sun because it can destroy the drives. You can do this with all kind of hard drives and flash drives. There are still lots of guides which can help you a lot while using Windows on your PC, so stay tuned to Windows Lifestyle to stay updated.