
Windows 10 operating system is designed to give its users a very user-friendly experience. Windows 10 has made its functions easier to understand and perform. One such function that has been simplified in Windows 10 is the reset and auto refresh function. These functions were broken into 2 different options in its predecessor i.e. Windows 8. Windows 8 had two distinct options through which the user had to select while in Windows 10 both the options are merged under a single label called ‘Reset’. Before understanding how to reset and auto refresh in Windows 10 let us first understand what these two options do.
- Reset: Reset as the name suggest resets the entire machine to its original settings. Resetting includes erasing of all the data from the hard drive of the machine. Resetting makes your machine a brand new machine without any trace of any data or app. Resetting deletes and wipes off the entire data from the machine. It is recommended to back up all your files before performing the reset function as all your data will be wiped out and your machine will be as clean as it was when you first purchased it. Thus choose the reset option only if you want your machine back to its factory settings.
- Refresh: Refresh is a bit different from its ‘reset’ counterpart. As the name suggests refresh option is used to refresh your machine. Under Refresh function the personal data of the user is untouched. So if you do not want to lose your personal data then select refresh option.
Thus above we have seen the difference between reset and refresh function. In both the functions, the operating system is restored to factory settings the only difference is whether the personal data is to be deleted or not. In Windows 10 both features are combined under a single label called reset. So when you click on reset the machine asks you pick one amongst the two options i.e. whether to delete or keep the personal data when the Windows 10 operating system is restored to factory settings.
So here is a step – by – step guide that explains Resetting and Refreshing of Windows 10:
- Start the machine that you want to reset
- Kindly note that while the machine starts sign – in into the machine through administrator account because any changes to the operating system can be done through the administrator account
- Click on the ‘Start’ button present on the desktop window of your machine
- After clicking the ‘Start’ menu will expand, in the left pane of the start menu click on ‘Settings’
- In the ‘Settings’ window click on ‘Update & Security’ option
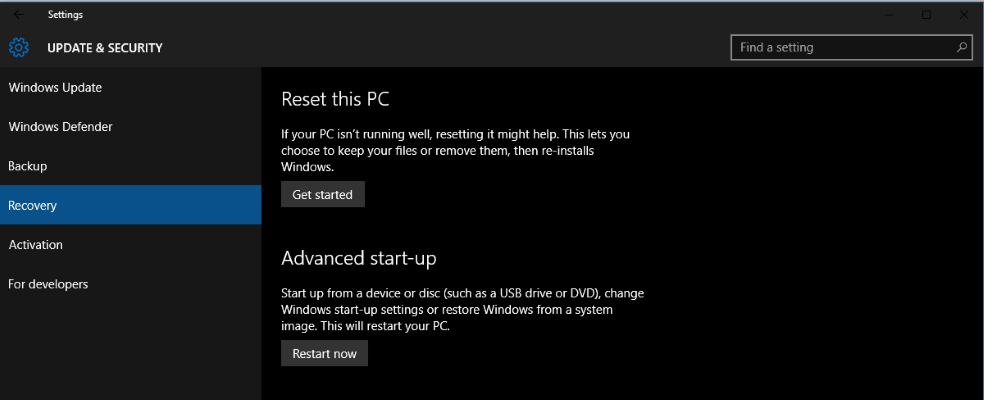
- On the left pane of ‘Update & Security’ window, click on ‘Recovery’ option
- Once you click on the ‘Recovery’ option the right pane will show the ‘Reset this PC’ section, under the ‘Reset this PC’ section you will see a button ‘Get Started’ click on it
- Then a window will prompt the user to ‘Choose an Option’ user need to select carefully one from the given two options. If the user wants to keep personal files and data then select ‘Keep my files’ option as this will remove all the apps from the computer but will keep personal files of the user. While if the user wishes to wipe off the entire data then select ‘Remove everything’ option.
- Once you click your desired option a window will appear that shows a list of apps that will be removed from your PC during the Windows 10 refreshing or resetting process
- Further, click on Next
- Lastly, a window will appear that will give details of the reset or refresh process and will prompt for clicking on the reset button to continue the Windows 10 refresh or reset process
Thus above is the entire guide to reset and auto refresh Windows 10. Let us know your comment below.