
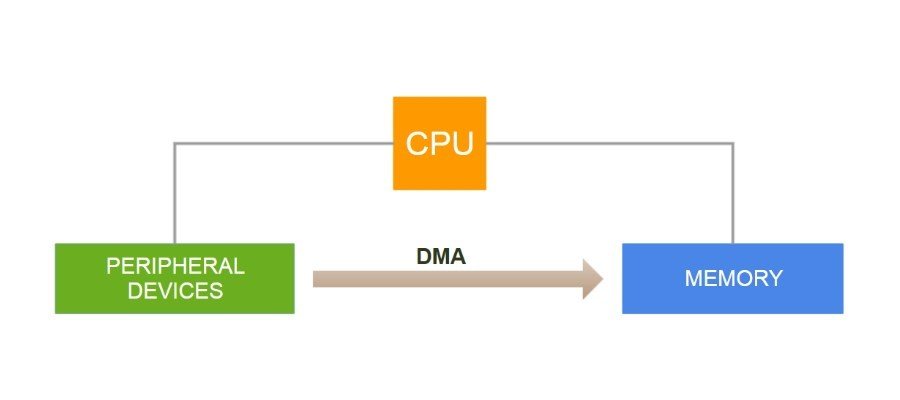
Direct Memory Access is a feature offered by Windows operating system which allows the data transferring or accessing the system memory without the use of the Central Processing Unit.
Usually or for most of the times data that is required or data that is fed into the computer undergoes processing from the Central Processing Unit but in some cases processing of data is not required or the data can be processed by another device for example: A sound card needs data from the system memory so rather than processing it through CPU it can efficiently use DMA to save the data processing time utilized by the CPU.
So in situations where the device can process the data by itself, the role of DMA comes into focus. DMA helps in saving the data processing time as it efficiently moves the data from the system memory to another device. For channelizing devices to process data by itself it is important to assign them to a DMA Channel.
Each port on the computer has a set of DMA channels that can be assigned to the device that is connected to the computer through that port. For ease of usability DMA’s default setting is ‘ON’ but in some cases, you might need to turn it on manually like if the connected device is incorrectly installed or if a system error occurs. Following is a step – by – step guide that will help you in understanding how to turn ON or OFF DMA in Windows.
- To turn ON or OFF DMA kindly note that you need to sign – in into the computer as an administrator.
- Click on Start button present on the main startup screen.
- As the start menu expands click on control panel.
- Once the Control Panel window opens click on ‘Hardware and Sound’( you will see this option on the left pane of the Control Panel Window.
- On the right pane of the Control Panel Window under Hardware and Sound, you will see the first option ‘Devices and Printer’ under it find and click on ‘Device Manager’ option.
- Upon Clicking ‘Device Manager’ window will open that will show a list device attached to your computer in the list double click on the option ‘IDE ATA/ATAPI controllers’.
- Every ‘IDE ATA/ATAPI Controller’ that has a word ‘channel’ written on its label can be assigned through their properties, so open the properties of IDE ATA/ATAPI controller right-click on it.
- Right Clicking the controller will open properties window of that particular channel.
- Now in order to enable or disable DMA click on ‘Advance Settings’ tab of the ATA Channel properties.
- Here you will find ‘Enable DMA’ Checkbox, checking it right and clicking on OK will turn ON the DMA and if you want to turn OFF the DMA then untick the ‘Enable DMA’ option and click on OK.
In this manner, you will be able to turn Direct Memory Access ON or OFF in Windows. Do you think there is another way? Do share your views in Comments.
What you’re saying to do is impossible.
after clicking properties on IDE ATA/ATAPI there is no advanced tab.