

What is Mobsync.exe and why is it running in Windows 10 is among the most common questions that users have about the operating system.
There are lots of processes and services that run by default in the Windows 10 operating system.
Most of them automatically start once you switch ON your computer.
When you are trying to close/terminate any process or service related to a third-party software/application, finding many other services running at the same time can be quite confusing.
If you have encountered the mobsync.exe process in your Windows 10 computer and is confused about its purpose, then today we are here with a detailed article explaining everything there is to know about the mobsync.exe process.
What is the Mobsync.exe Process?
The Mobsync.exe process belongs to Microsoft and particularly the Microsoft Sync Center.
Microsoft Sync Center is itself a process that is available on all modern Windows releases. With the help of this process, Windows automatically syncs files with your mobile devices through a network.
One great advantage of Microsoft Sync Center is that it can sync data even in offline mode, and the Mobsync.exe process is used for exactly that.
Why is Mobsync.exe Running on Your Computer?
If you have SQL Server or Internet Explorer 6 installed on your PC with offline page sync enabled, or if you have a Windows Mobile device that has the ActiveSync feature enabled, then the Mobsync.exe process will be running on your computer.
So, if you use the offline webpage viewing or offline data sync features in Windows 10 or through any of the installations on your computer, then you should leave the Mobsync.exe process enabled.
How to Turn OFF Mobsync.exe on Windows 10 (Sync Center)?
In case you need to turn OFF Mobsync.exe on your Windows 10 computer, below are the steps you need to follow:
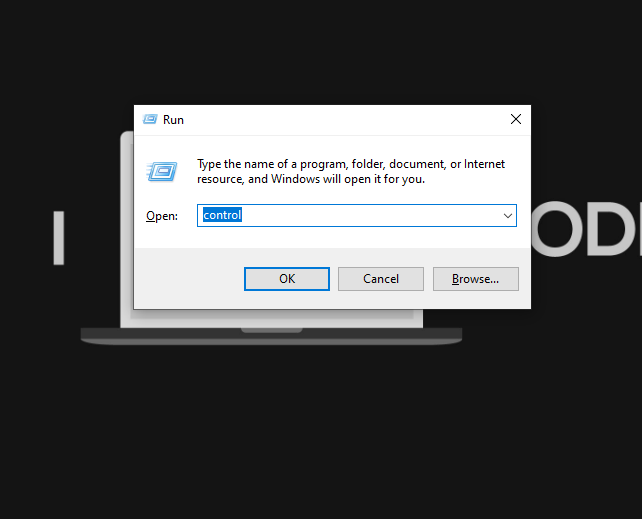
- Press the “Windows” + “R” key on your keyboard to launch the Run window.

- Here, type the command “control” and press the “Enter” key on your keyboard to launch the Control Panel window.
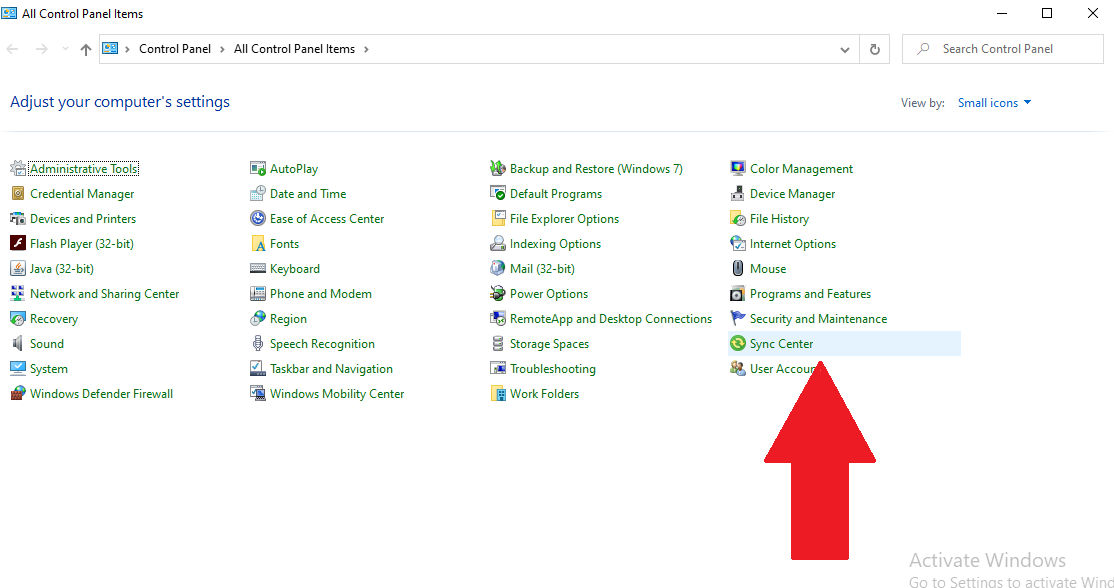
- Within the Control Panel window, click on “Sync Center”.

- In this window, click on “Manage offline files” from the options list on the left side of the window.
- Now, click on the button that says “Disable offline files”.

- Finally, click on the “Apply” button in the bottom right corner of the window and then click on the “Ok” button adjacent to it.

Now you have disabled the Mobsync.exe process and in order to complete the procedures, you need to restart your computer.
Once your computer restarts successfully, you can then check your task manager for the Mobsync.exe process. If you are not able to see the process in the task manager, this means that the process has been successfully disabled on your computer.
If you wish to enable the Mobsync.exe process at any later point in time, you can follow the same steps above, and instead of the “Disable offline files” option, you will be able to see the “Enable offline files” option. Click on this option and the process will start running again after a restart of your computer.
Final Words
We hope you found this article detailing the Mobsync.exe process and its use as informative and easy to understand.
In case you have any queries regarding the Mobsync.exe process or any other Windows 10 processes, do leave your question as a comment below and we will help you out.