
Have you noticed, when you click “Shut Down” on your Windows 10 PC, your system doesn’t fully shut down? This strange problem is very common, whenever user shut down their system having open programs, they find them all in the same state when they power it back on. What actually happens when a user shuts the system is that it hibernates the kernel, saving its state so it can boot faster when you use the computer back again.

What’s causing this problem? The “Fast Startup” feature
Windows 10 uses a Fast Startup feature, yes, this is exactly what’s causing shut down problems in this OS. This feature is enabled by default and was first introduced in Windows 8. It is also called Fast Boot and Hybrid Boot or Hybrid Shut down.
The traditional shutdown process commanded the Windows to fully shut down, it uses to totally discard the running system state and starts up the system from scratch it boots again. Coming to hibernation, Windows saves the entire system state to the disk so that the user can speedily resume from where they left off. The Fast Startup feature combines the traditional shutdown process with hibernation.
With Fast Startup activated, Windows 10 throw-outs all your open files and programs, but saves the state of the Windows kernel to disk just like the hibernation process. So, next time when the user boots their PC, Windows restores the kernel and starts up the rest of the system.
This kernel hibernation method happens automatically when the user clicks “Shut Down.” But what does it mean? It means that if a hardware driver in your kernel is experiencing any issue, shutting down the PC and booting it back won’t fix it. Basically, Shutdown action in Windows saves the current state and brings it back it instead of reinitializing.
Disabling “Fast StartUp” feature
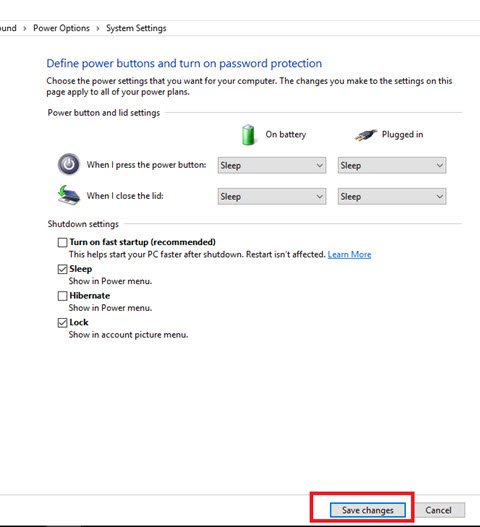
To disable this feature:
- Right-click the Start button
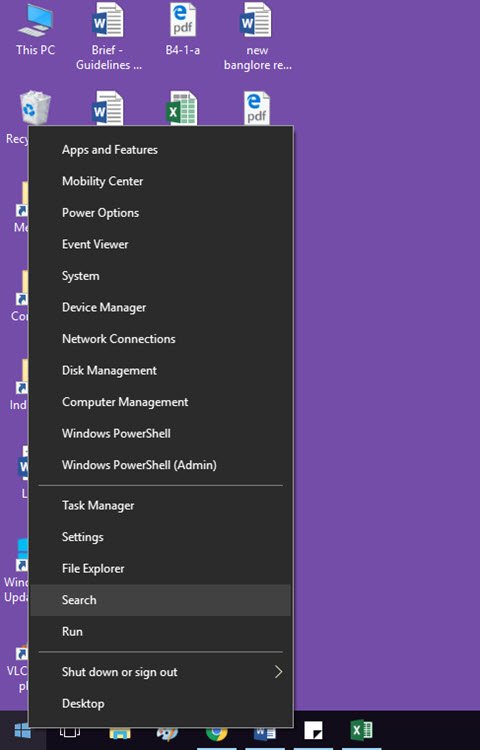
- Click “Search”

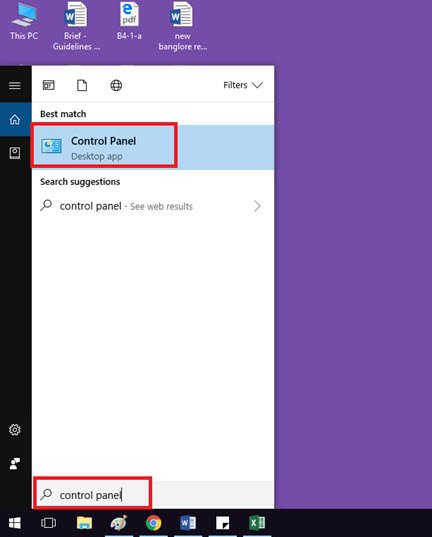
- Type “Control Panel” and hit “Enter”
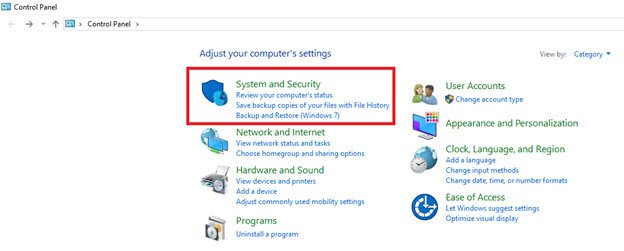
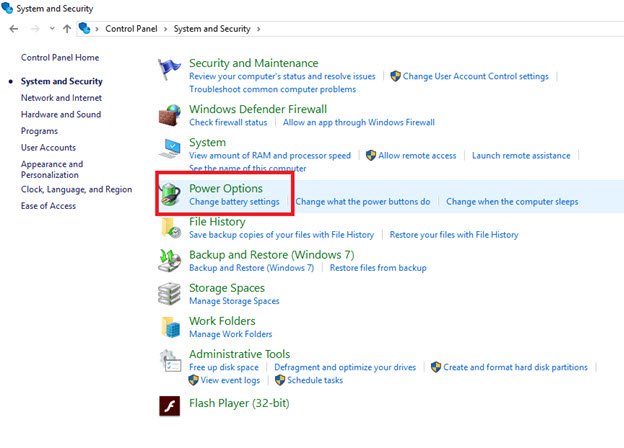
- Go To “System and Security”
- Click “Power Options”
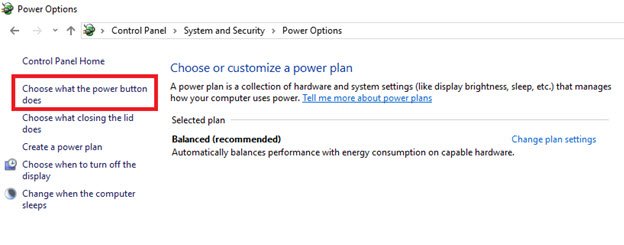
- Click “Choose what the power buttons do”
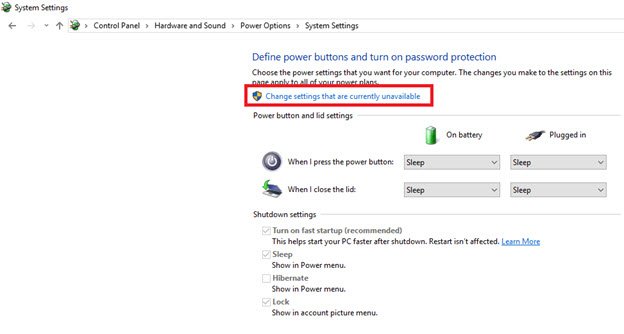
- Click “Change settings that are currently unavailable”
- Click “Turn on fast startup (recommended)” so that the checkmark disappears
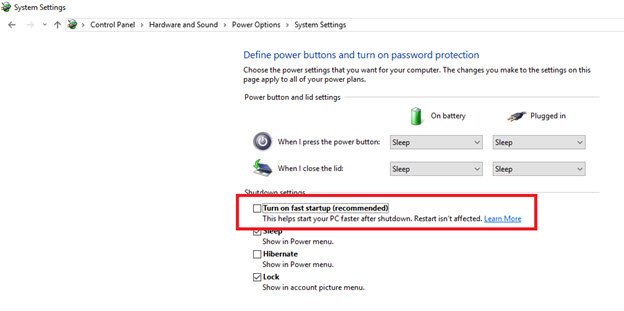
- Click “Save changes”
How to fully shut down Windows 10 PC
There are a number of ways a user can shut down his/her PC:
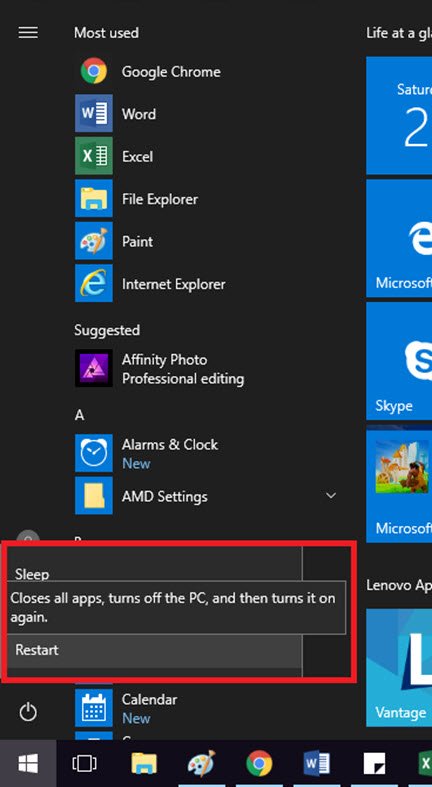
- Restart
To empower Windows to pick up things from scratch user needs to perform a full shut down of the kernel. To do this, just click the “Restart” option in the menu instead of the “Shut Down” option. Windows automatically restarts your computer, it performs a full shut down first and also junks the state of the kernel while doing so.
- Command Prompt or PowerShell window
To do so, open a Command Prompt or PowerShell window.
- Go To Start Menu and Type “Command Prompt”
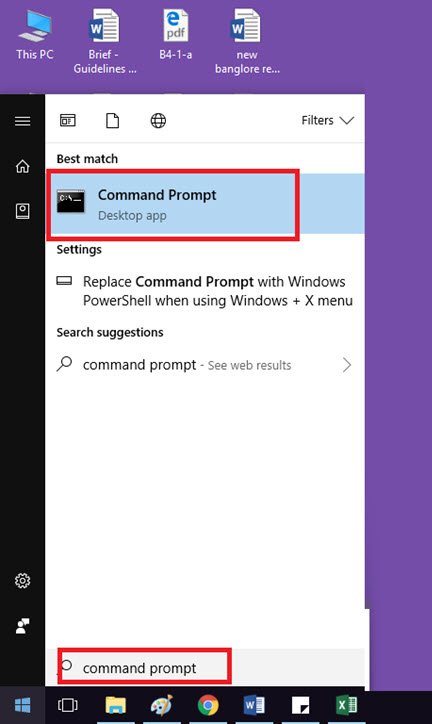
OR
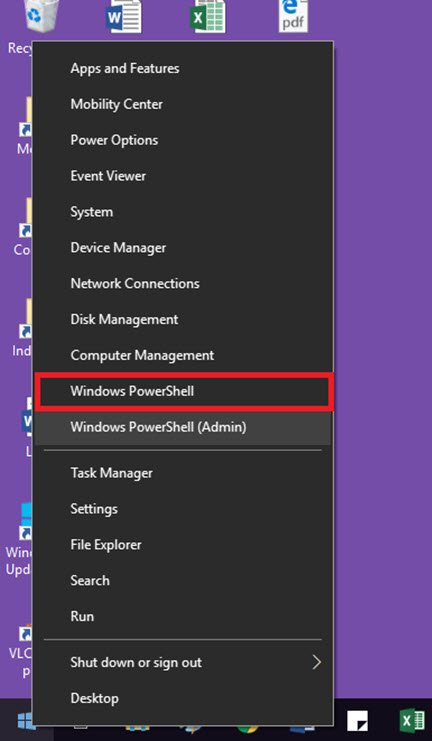
- Right click on “Start Menu” and select “Windows PowerShell”
Type the command “shutdown /s /f /t 0”, and then press “Enter”
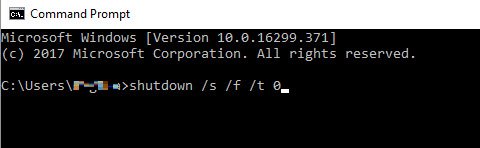
This command directs Windows to shut down directly and forcibly close any open applications. Note, the shutdown command will always complete a full shutdown unless the user adds the hybrid option.
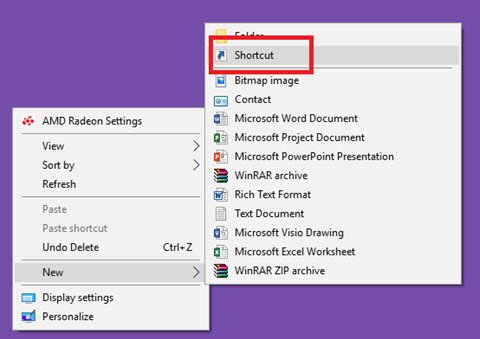
- Create A Shutdown Shortcut
Another recommended option is by creating a shortcut on the desktop.
- Right click on the desktop and select “shortcut”
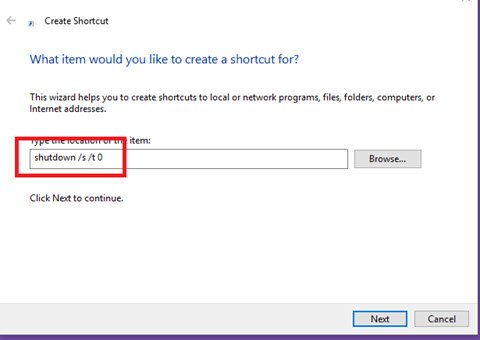
- On shortcut location type “shutdown /s /t 0”
- Click “Finish” To Activate the Shortcut
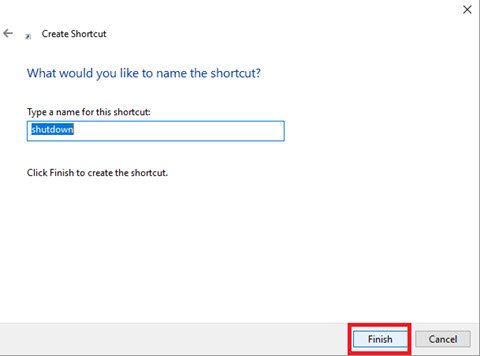
Now every time you double click “Shut down” shortcut, Windows 10 will perform a full shutdown.
Conclusion
It is not recommended to disable the “Fast Startup” feature unless the user has good reasons. This feature helps to boot PC’s faster most of the time, and when the user really needs fully shut down, they can always use the tricks we discussed here.