

Are you looking for ways to extract the CAB file on Windows 10? If you’re asking this question, then in this article we provide you the simplest techniques to extract CAB files on any Windows 10 PC.
What is a CAB File?
CAB files, short form for Cabinet Files, are generally compressed form for software installation files.
So, whenever you are trying to install software on your computer, the installation files for the software will be having the CAB extension mostly.
The reason for using the CAB file extension is that it becomes easier for people to download the package and also it downloads faster.
You can only find the CAB file format within the Windows operating system as it is native to the OS.
Moreover, the extension supports various other popular algorithms for data compression such as LZX, Quantum, and ZIP.
The CAB files are also used by various installers from Microsoft including AdvPack, SetUp API, and Device Installer.
Also, the CAB package usually contains a digital signature which assures the recipient of the software files that the package comes from a trusted source.
How to Extract CAB Files on Windows 10?
Now that you know about the CAB files and their use, below are the methods to extract CAB files on a computer running the Windows 10 operating system.
Method 1: Extract CAB Files using WinZip
WinZip is a popular tool used to compress/decompress files and folders.
You can use the same tool to extract CAB files as well on Windows 10.
Below are the steps to extract CAB files using WinZip on any computer running the Windows 10 operating system.
- Navigate to the folder on your Windows 10 computer where the compressed CAB file(s)/folder(s) is stored.
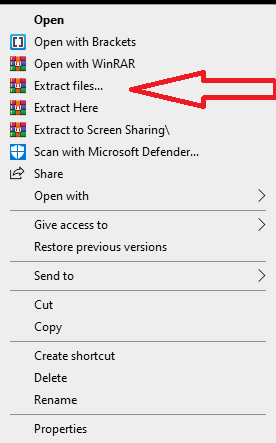
- Using your mouse, right-click on the file/folder.

- From the drop-down menu that appears, click on the option that says “Extract files…”.
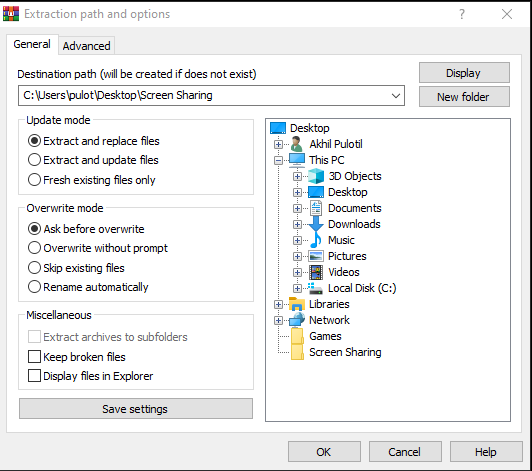
- A new WinZip window will now appear.

- In the “Destination path” field, select the location where you wish to save the extracted CAB files/folder.
- Now, click on the “Ok” button located in the bottom right corner of the window.
Wait for the extraction to complete.
After completion, you can find the extracted CAB files/folder in the destination path you provided in Step 5 above.
Method: Extract CAB Files on Windows 10 using Command Prompt
You can also extract the CAB files using the Command Prompt on Windows 10.
Below are the steps you need to follow to do the same.
- Press the “Windows” key + “R” key on your keyboard.
- The Run window will now open.
- Type “Cmd” and click on “Ok”.
- In the Command Prompt window that appears, type in the below command:
Expand filename.cab -F:* C:\TWCFolder
- In the above command, replace “filename.cab” with the name of the file you wish to extract. However, do not forget to mention the “.CAB” file extension. You also need to replace “C:\TWCFolder” with the destination pathname where you wish to save the extracted CAB file.
And that’s all. You have now finished extracting the CAB files using Command Prompt on Windows 10.
Final Words
We hope you found this article on the easiest ways to extract CAB files helpful. Do stay tuned with Windows Lifestyle to get more Windows 10 tips like this one.