

In today’s article, we will guide you on how to remove a device from the Movies & TV app in Windows 10. Nowadays, people prefer to watch movies by renting and purchasing online so that they can watch the movie as per their convenience and not necessarily in one single stretch.
For Windows users, the Movies & TV application is an inbuilt system application that allows them to either buy or else rent movies and even TV shows from within the application. The Movies & TV app in Windows 10 features some of the best and latest movies and TV shows to choose from and the collection is regularly updated so that you do not miss any of the latest movie releases or TV show episodes.
Apart from the High Definition HD content that is offered within the application, another benefit of using the Movies & TV app for Windows is that once you purchase content from within the application, you can download the same content on multiple devices including your Windows PC, Windows tablet, Windows Phone or Xbox. However, in case you choose to rent the content, then you are restricted to play the content only on the device on which you rented them.
Even though you can enjoy downloaded content on multiple Windows devices and can connect multiple Windows-based devices of yours to the same Movies & TV app account, if you connect a maximum of 5 different devices, then at times some random error or restriction may popup, especially when you choose to rent content and in order to solve the error, you will need to remove connection to at least one of the connected devices.
Therefore, if you are facing with an error in the Movies & TV app for Windows that requires you to remove your device that is connected to the app, then below is a detailed tutorial on how you can do the same.
How to Remove Device from the Movies & TV app in Windows 10
- Click on the search bar that is located at the bottom left corner in the taskbar of your Windows 10 system.
- Within the search bar, type “Movies & TV”.
- From the search results that appear, click on the “Movies & TV” app icon.
- A new “Movies & TV” app window will now launch.
- Once the “Movies & TV” app is launched, click on the three dots that are present at the top right corner of the app window.
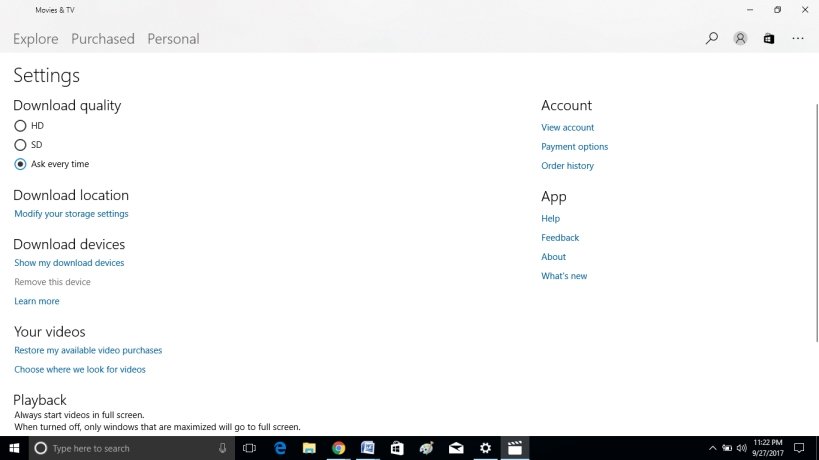
- From the drop-down menu that appears, click on the “Settings” option.
- Within the Settings menu, under the Download Devices section, click on the “Remove this device” option and confirm the selection if prompted.
- And now, the current device that you are using to access the “Movies &TV” app will be removed from the list of connected devices.
This is how you can easily remove connected devices from the Movies & TV app in Windows 10 powered devices. Please be advised that you are allowed to remove only one device every 30 days from the list of connected devices.
Final Words
Hope you found the above article on how to remove a device from the Movies & TV app in Windows 10 helpful. In case of any doubts, please do mention them as comments to this post.